How to Take a Screenshot in CapCut PC and Mobile
Are you looking to capture perfect screenshots while editing your videos in CapCut?
There's many times when I've been editing where a screenshot for social media or YouTube comes in handy. So knowing how to take a screenshot in CapCut is essential for content creators.
In this straightforward guide, I'll walk you through the process of taking screenshots in CapCut on both PC and mobile devices. We'll also look at some free online screen recorder software too!
Want 10 FREE Cinematic LUTs?
Enter your email and we'll deliver them now.
How to Take a Screenshot in CapCut PC?
Taking a screenshot in CapCut's desktop version is straightforward and offers multiple methods to capture your screen. The highest quality and easiest way is to use the inbuilt Export Still Frames feature:
Using CapCut's Built-in Screenshot Feature
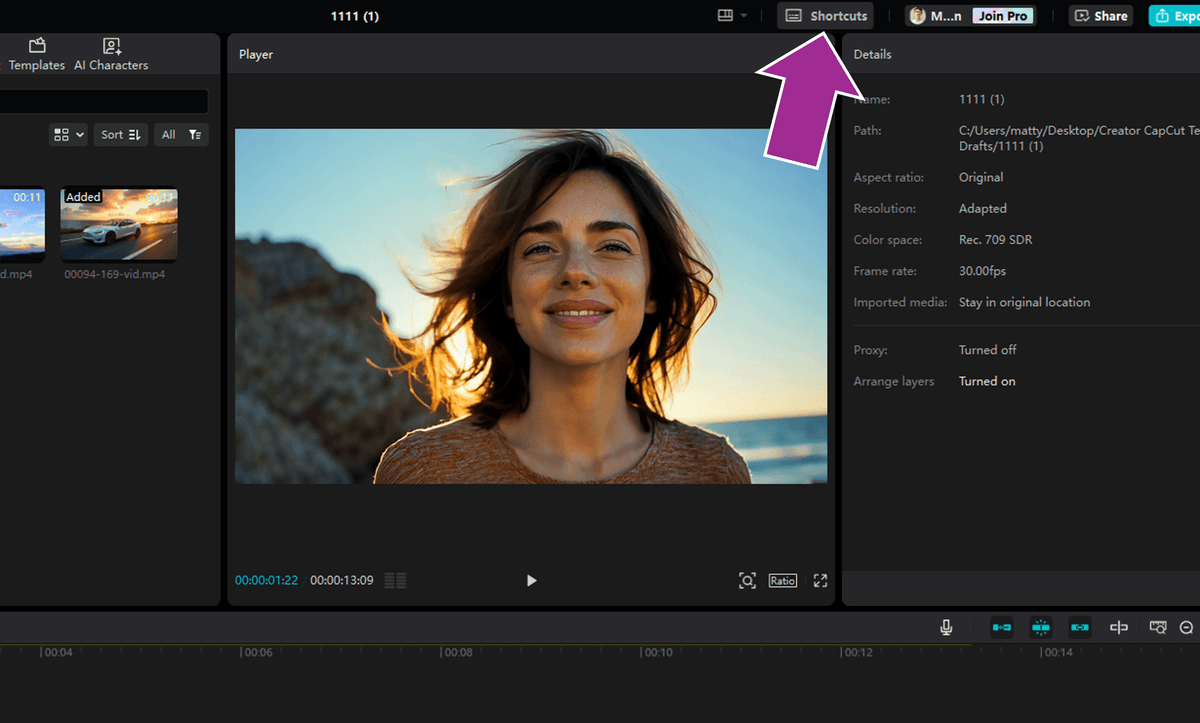
- Click "Shortcuts" in the very top menu bar

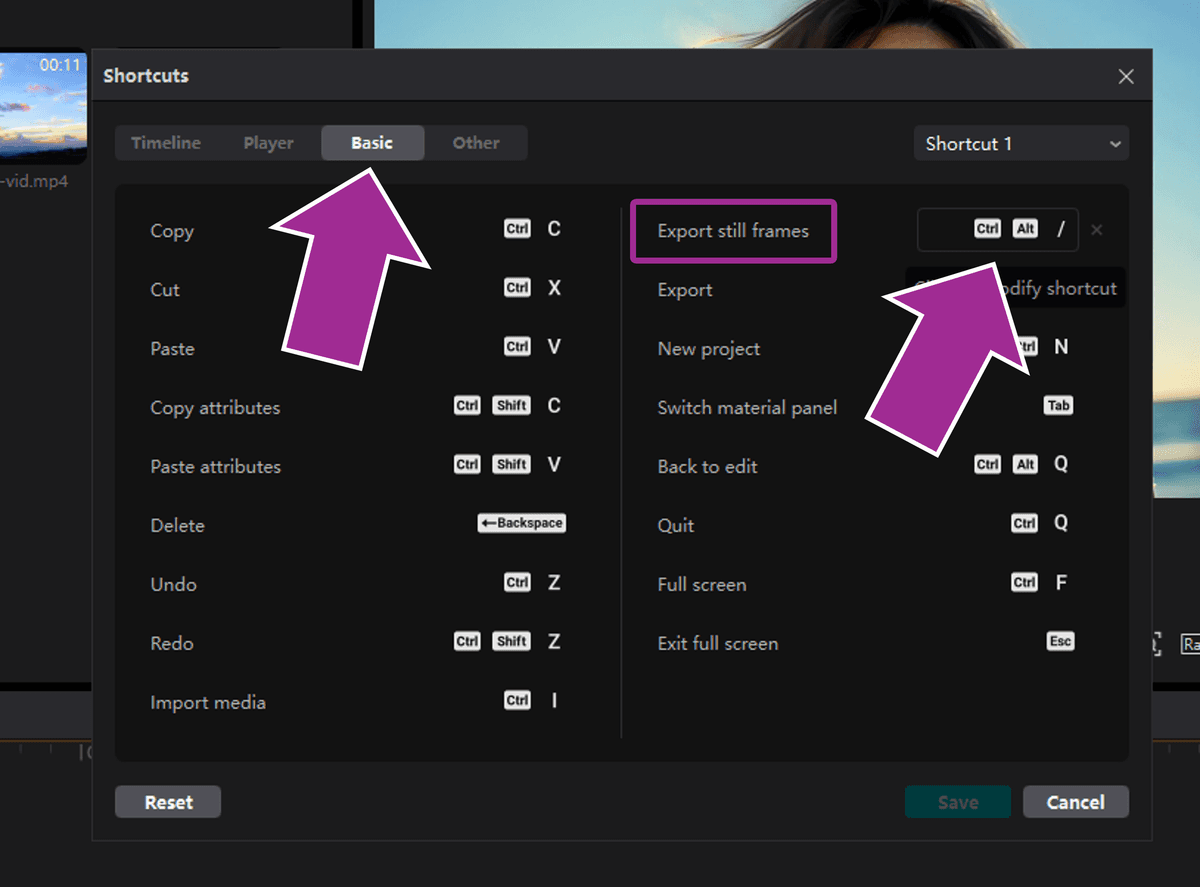
- In the popup menu, click over to the "Basic" tab
- You'll need to set a keyboard shortcut for "Export Still Frames", I used ctrl + alt + /

- Click "Save"
You can now use the keyboard shortcut to export still frames from your video! Simply press the keyboard shortcut, name your file, and choose your save location. Simple!
How to Take a Screenshot in CapCut Mobile?
Unlike desktop, there's no designated way to take a screenshot in CapCut mobile. In earlier versions, you were able to export a cover photo, but in the newer versions this feature has been removed. The easiest way to take a screenshot in CapCut mobile is to use your device's screenshot buttons:
Using Device Screenshot
- Open your video project in the CapCut app
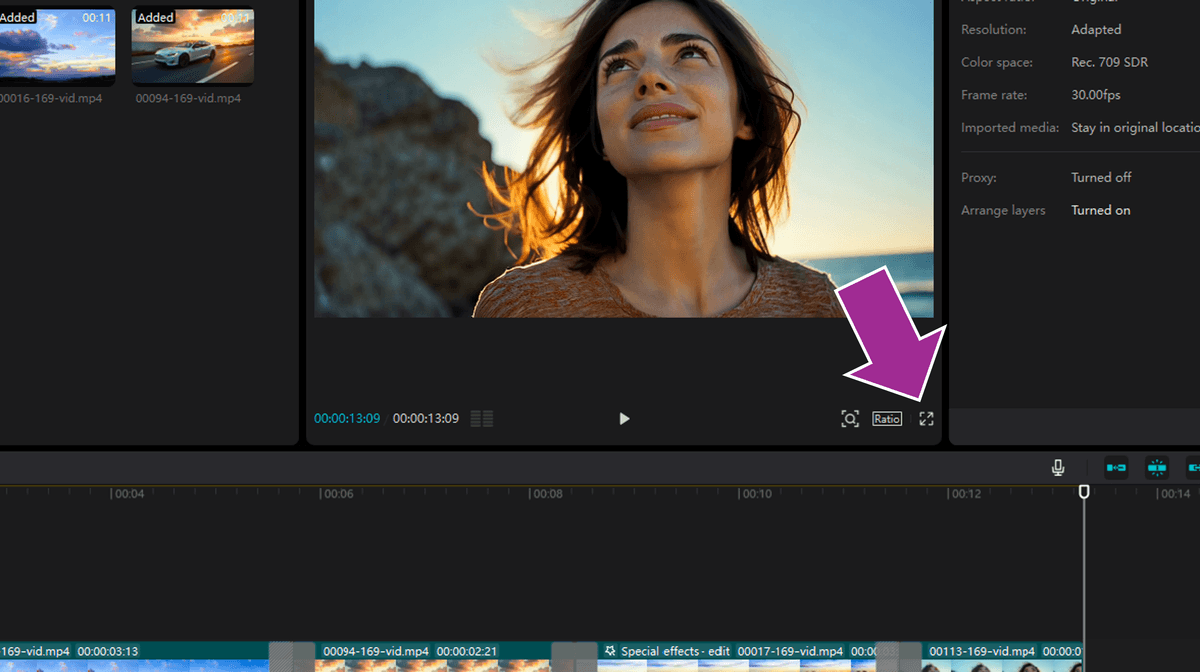
- Use the timeline to scrub to the frame you want to screenshot, then click the full screen icon

- Then use your device's screenshot shortcut: for Android: Press Power + Volume Down, For iOS: Press Side Button + Volume Up
- Crop the bottom of the image to remove the play timeline
And that's how to screenshot on CapCut mobile! Alternatively, if you want to set your video's cover photo in CapCut mobile, here's how.
Setting Your Video's Cover Image in CapCut Mobile
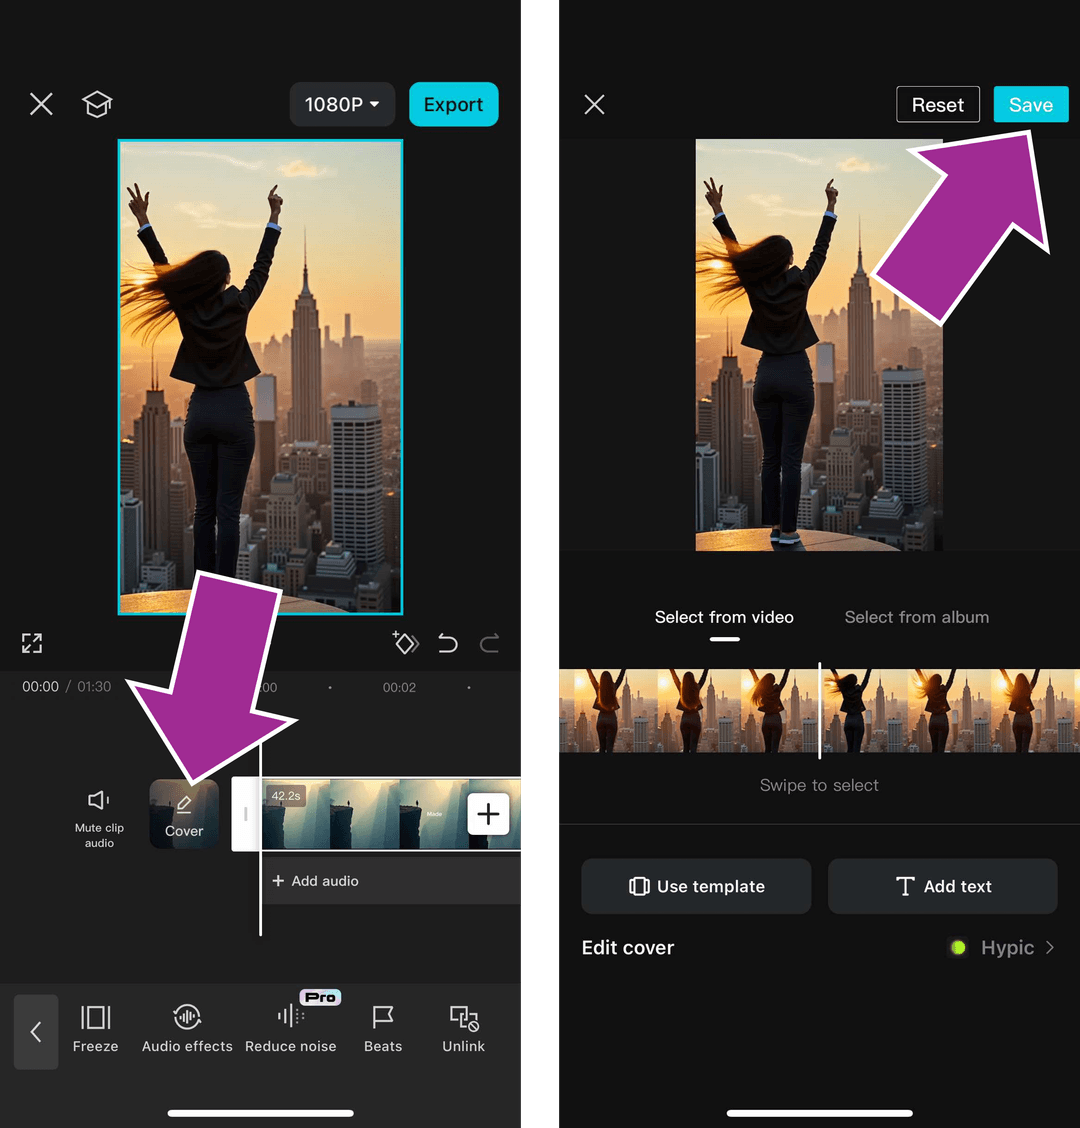
- Scroll to the very start of your video timeline and tap "Cover"
- Then scroll to the frame you want to use as your cover image, and tap "Save" in the top right

Previously this exact method used to save a screenshot to your gallery, but now it will just set the cover image. I'm not sure why CapCut removed this functionality (annoying!)
How to Screen Record in CapCut?
Not that I recommend it, but some users use free screen recording software to export CapCut videos with Pro features without paying! Here's how:
Desktop Screen Recording
- Download free screen recording software like OBS Studio
- When you've finished editing your video projects in CapCut, open OBS Studio
- Select screen capture in OBS, start recording, then navigate back to CapCut
- Click the full screen button

- Press play on your CapCut video
That's it! Now you can export CapCut videos that include Pro features without have to pay a subscription (again, I don't recommend doing this!)
Pro Tip: Add a few seconds of blank screen at the start of your video so your screen recording doesn't capture the CapCut playback nav bar.
Mobile Screen Recording
Similar to the desktop version, you can use your mobile device's screen capture to record video projects from CapCut without having to export directly.
For iOS:
- Swipe down and press the screen record button to start capturing screen
- Navigate to CapCut, full screen your project and press play
For Android:
- Swipe down twice from the top of your screen to open Quick Settings, then tap "Screen Record" (or "Screen Recorder" on some devices)
- If you don't see the screen record option, you may need to edit your Quick Settings panel and add it first
Tips for Taking Quality Screenshots in CapCut
Here's a few general tips for taking better screenshots using CapCut desktop version or the mobile app:
- Use Full Screen Mode: Expand your video projects to fill the entire screen before taking a screenshot in CapCut - this ensures maximum quality and eliminates distracting toolbars
- Customize Display Settings: Adjust your CapCut window settings for optimal picture clarity - set your preview window to "Best Quality" under settings before capturing
- Time Your Screenshots: When recording tutorials, pause the video at exact frames where you want to take a screenshot - this prevents motion blur and creates crisp captures
- Master Quick Controls: Save time by learning CapCut's keyboard shortcuts for screenshots on your PC or device settings for mobile captures
- Organize Your Workspace: Before taking a screenshot, declutter your CapCut interface by hiding unused tools and panels for cleaner captures
- Match Screen Resolution: Ensure your screen recording quality settings match your display resolution when capturing screenshots from recorded content
- Use Annotation Tools: After taking your screenshot, use CapCut's built-in tools to add arrows, text, or highlights before saving
- Consider Frame Export: For highest quality still images from your videos, use CapCut's frame export feature instead of basic screenshots - this preserves the original video quality
- Enable High DPI Settings: On Windows PC, enable "High DPI settings" in CapCut's properties to ensure crystal-clear screenshots on high-resolution displays
- Save in the Right Format: Export your screenshots in PNG format when quality matters most, especially when capturing CapCut's interface elements or text
Tired of Wasting Hours Looking For
Royalty-Free Assets?
Access our curated library of 100,000+ royalty free assets instantly
Wrapping Up
Taking a screenshot in CapCut is a valuable skill that will definitely come in handy at one time or another.
Whether you're using the PC version or mobile app, these methods give you full control over capturing your screen content. Remember to save your screenshots in a organized manner for easy access when creating tutorials or sharing your editing process.
Want to read more? Check out this ultimate guide to adding transitions in CapCut.
Happy editing. 😎
Frequently Asked Questions
Can I use CapCut screenshots for tutorials?
Yes, CapCut screenshots are perfect for creating tutorials and educational content. Make sure to capture high-quality images using the Export Still Frames feature on desktop for the best results.
Why won't my CapCut screenshots save?
If your screenshots aren't saving, check your storage permissions and ensure you have enough free space. On mobile, make sure you've granted CapCut access to your device's storage.
What's the best format for saving CapCut screenshots?
PNG format is recommended for CapCut screenshots as it provides the best quality without compression. This is especially important when capturing text or interface elements.
Can I capture multiple frames at once?
Using the Export Still Frames feature on desktop, you can capture multiple frames in sequence. This is particularly useful when creating storyboards or step-by-step tutorials.
Do screenshots include CapCut watermarks?
Screenshots taken using the built-in Export Still Frames feature or device screenshot methods won't include CapCut watermarks unless they're visible in your project preview.


