How to Add LUTs to Capcut for PC (And Filter LUTs for Mobile)
Alongside transitions, overlays, and captions, adding LUTs (look up tables) to your video editing skillset is one of the simplest ways to boost the visual quality of your content.
In this guide, I'll show you exactly how to add LUTs to CapCut for both mobile and PC users, plus show you a neat way to make transitions with LUTs in CapCut.
If you're looking for a fast way to level up your color grading process, this article is for you.
Get 10 free LUTs just like this! (enter your email below, they're free)
Want 10 FREE Cinematic LUTs?
Enter your email and we'll deliver them now.
In This Article
How to Add LUTs to CapCut Mobile
You've probably been scouring the internet for this answer and I've noticed no one seems to give a clear answer. So here it is!
How to Use Your Own Custom LUTs in CapCut Mobile? You Can't.
I have tried creating LUT presets on CapCut desktop and exporting to mobile via CapCut spaces, and it does not work.
Unfortunately right now, there's no way to work with your own custom LUTs in CapCut. The only thing you can do is use the pre-built color grading LUTs in CapCut. Here's how.
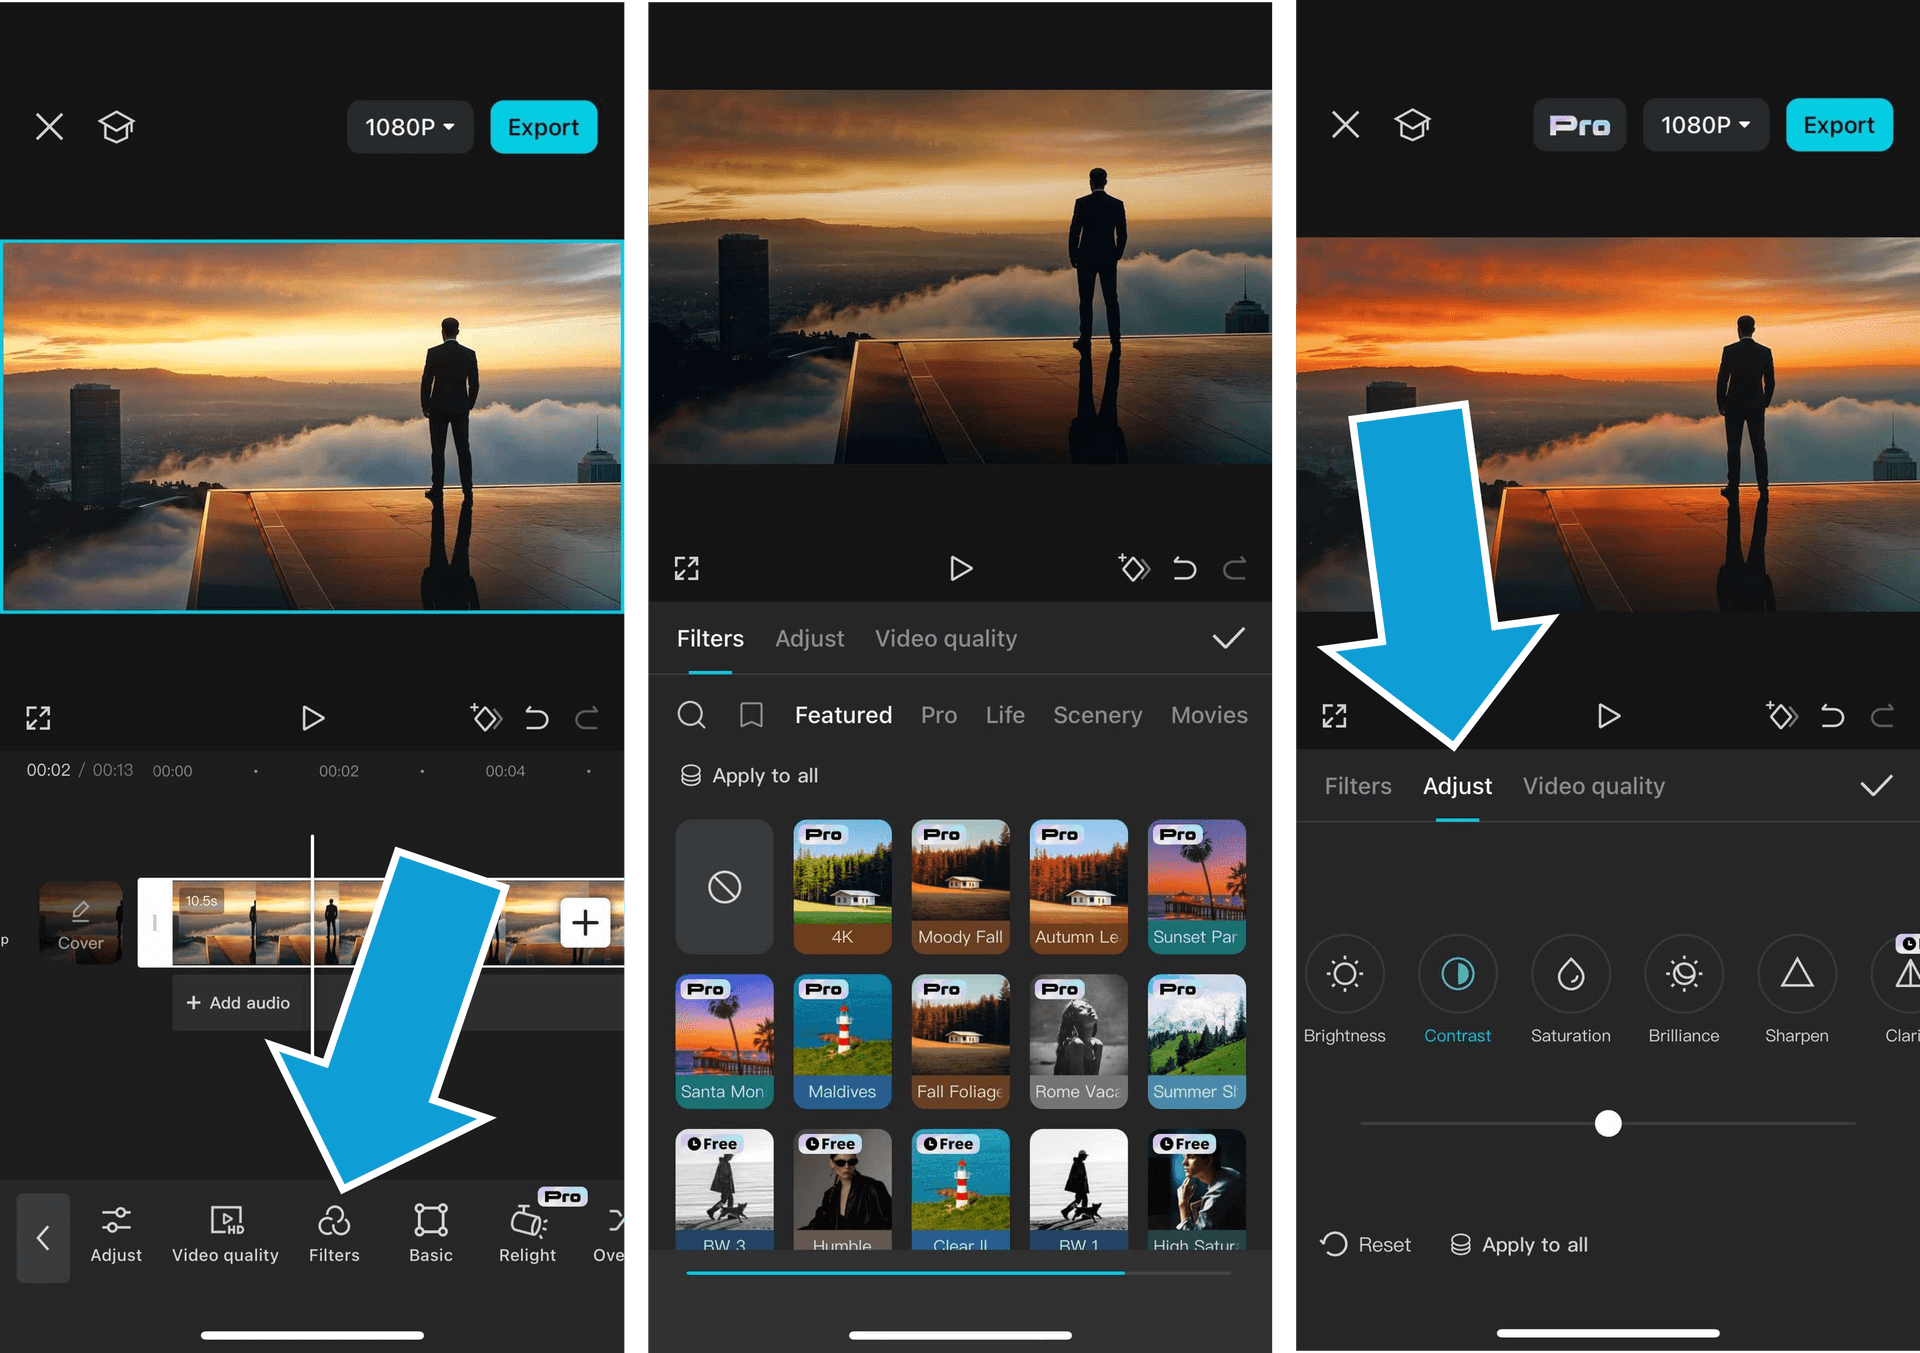
- Tap the clip you want to apply a LUT to
- Tap "Filters" in the bottom menu
- Choose a filter (AKA a LUT)
- Tap "Apply to all" if you want this Filter (LUT) to be applied to all your clips on the timeline

- Tap over to the "Adjust" tab if you want to fine tune and settings
That's it! Unfortunately, the devs at ByteDance don't want us using our own LUT files for video editing in the CapCut mobile app, so this is the best alternative.
How to Add LUTs to CapCut PC
If you're truly committed to applying your own custom LUT files to your video content, then the CapCut desktop app is the easiest way. Here's how to add LUTs to CapCut using the desktop app.
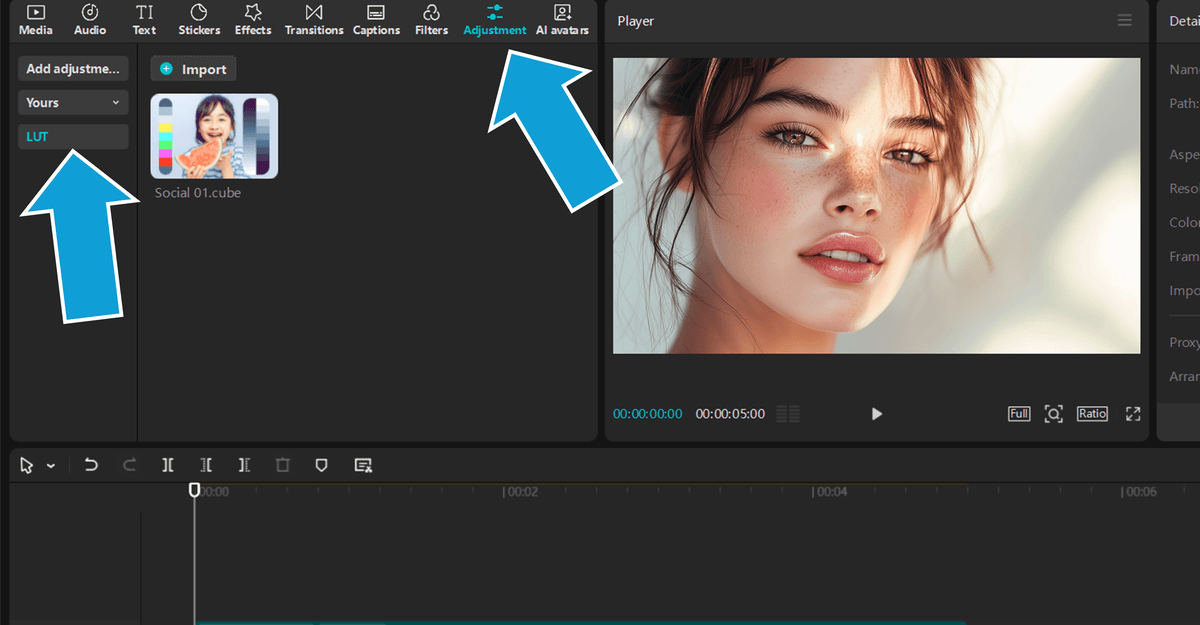
- Click the "Adjustment" tab in the top left, then click LUT. Here's where you can import LUTs into CapCut

- Click the "Import" button, or you can drag and drop your LUTs into the space provided
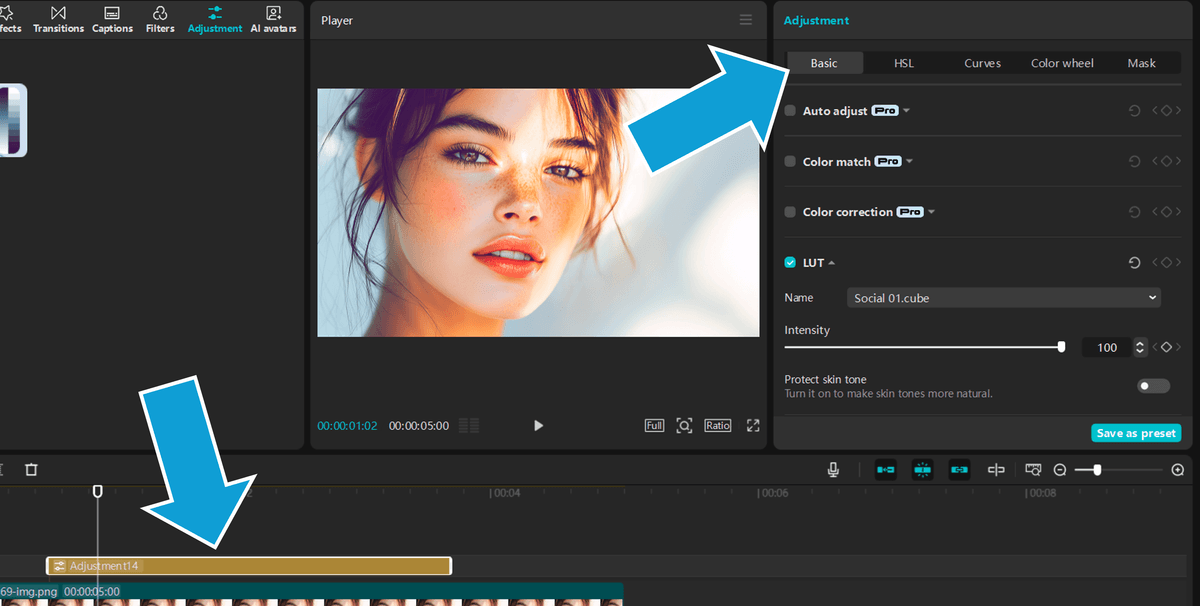
- Now you can drag and drop your LUT onto the video editing timeline
- Click the "Adjustment" layer on your timeline, this opens the Adjustment panel in the top right side. Here you can fully edit your LUTs and do further color grading and color balance using the HSL, Curves, Color Wheel, and Mask tabs.

And that's how you import and add LUTs to your video editing project in CapCut PC!
Pro tip: Use the desktop app to apply LUTs then export the footage so you can continue editing on your mobile.
Creating A Transition with LUTs
Here's a quick tutorial showing how you can make a basic transition using LUTs in CapCut:
- Follow the steps above to import your LUTs into CapCut
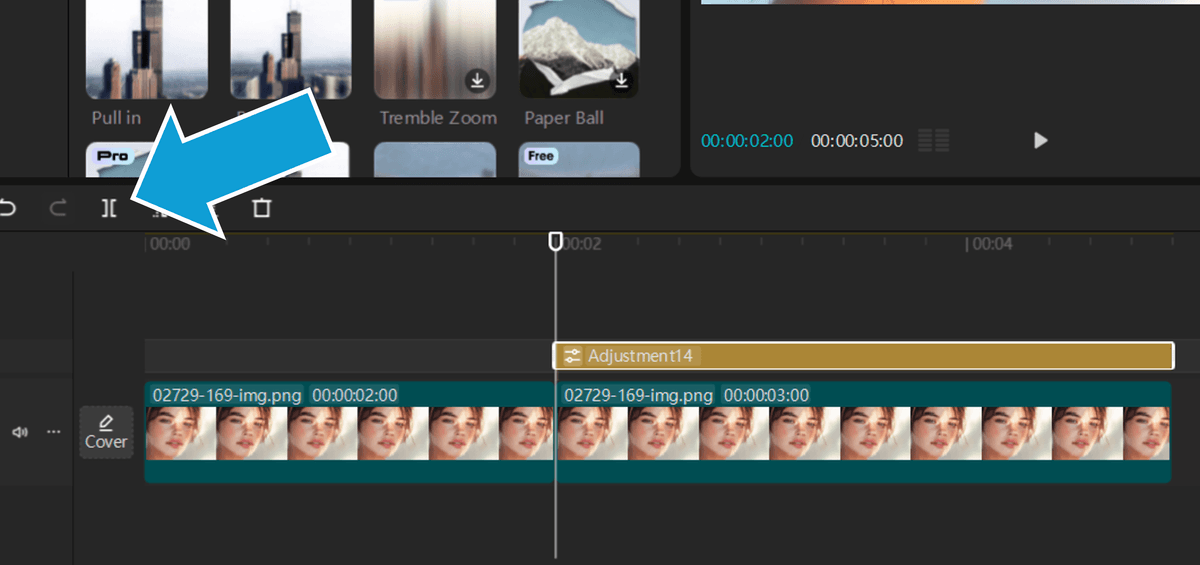
- Move the playhead to the point where you want to transition into your LUT filtered footage
- Click the clip and use Split by clicking the icon, or using Ctrl/Cmd + B

- Next, highlight the adjustment layer AND the video layer by left clicking and dragging
- Right click and select "Create compound clip"
- Now you can apply transitions as you normally would between the two clips
This style of LUT transition has become massively popular on TikTok for video editors looking to showcase photos in a powerful way. Make it hit even harder with the right song choice!
Want 10 FREE Cinematic LUTs?
Enter your email and we'll deliver them now.
5 Tips For Working with LUTs in CapCut
Here's 5 tips from a pro editor for working with LUTs in CapCut:
- Save Favorites First: Always save your preferred LUTs to the Favorites folder for quick access across different video projects. In CapCut you can save your LUTs as a preset by clicking it on the timeline and clicking "Save as preset" on the right side of the screen
- Start Subtle: Begin with a low intensity setting (around 40-50%) when applying LUTs for more natural color grading results
- Preview Before Applying: Use the real-time preview function to compare different LUTs side-by-side before committing to your desired look
- Adjust Post-LUT: Fine-tune brightness, contrast, and saturation settings after applying the LUT for precise control over the final appearance
- Match Clip Colors: Apply the same LUT across multiple clips in your video editing timeline to maintain consistent color grading throughout
Using these tips when video editing with LUTs will ensure your color grading efforts don't go unnoticed by viewers!
Wrapping Up
Today we how to edit video using LUTs in CapCut.
Unfortunately, the guys at CapCut haven't made it possible for us to use our own custom LUTs in the mobile app yet, but there are still heaps of filters to choose from - which are the same thing.
LUTs are a great way to level up the aesthetic of your content in just a few clicks, without stuffing around for hours trying to adjust settings!
Happy Editing! 😎


