How to use Clipchamp for Video Editing
If you've just stumbled across Microsoft Clipchamp on your Windows machine, don't worry, that's how most people find it!
In this beginner's guide, I'll show you exactly how to get started editing content in the Clipchamp free video editor. We'll go from total newbie, to exporting your first video!
So if you're looking to learn the basics of Microsoft Clipchamp, you're in the right place!
Want 10 Royalty Free LoFi Tracks?
Enter your email and we'll send them now!
In This Article
The Benefits of Clipchamp
If you're still not sure you actually want to use Clipchamp, here's some reasons why it's actually a pretty great video editing suite to get started with:
- It's Free: Yep! That's probably the biggest drawcard - Clipchamp is a free video editor that allows you to create and edit videos online
- It's Already Installed: You can get started instantly by pressing the windows key and typing Clipchamp. It's already installed and ready to go!
- It's User Friendly: The creators of Clipchamp have made the user-interface intuitive and relatively easy to get started for new users in the video editing scene
- AI Features: Clipchamp has a range of AI features you can use for FREE! Most other software tools like CapCut and Premiere Pro charge users for these exact features
If you're still reading, you're most likely convinced that Clipchamp is right for you, so let's get started on how to use Clipchamp!
How to use Clipchamp?
To get started using Clipchamp, press the windows key and type "Clipchamp." Choose Microsoft Clipchamp, and wait for the user interface to load. (It's already installed on your machine!)
If it's not already installed, you can download the latest Clipchamp here.

1. Importing Media
Once the user-interface is loaded, you'll be met with a range of options. To get started, click "Create a new video."
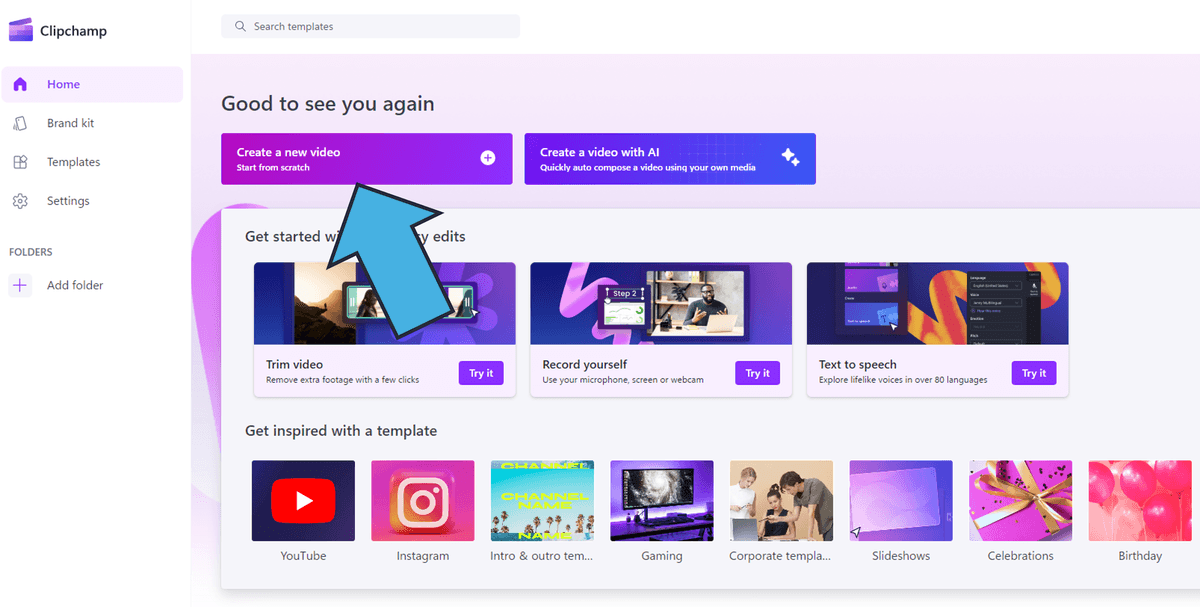
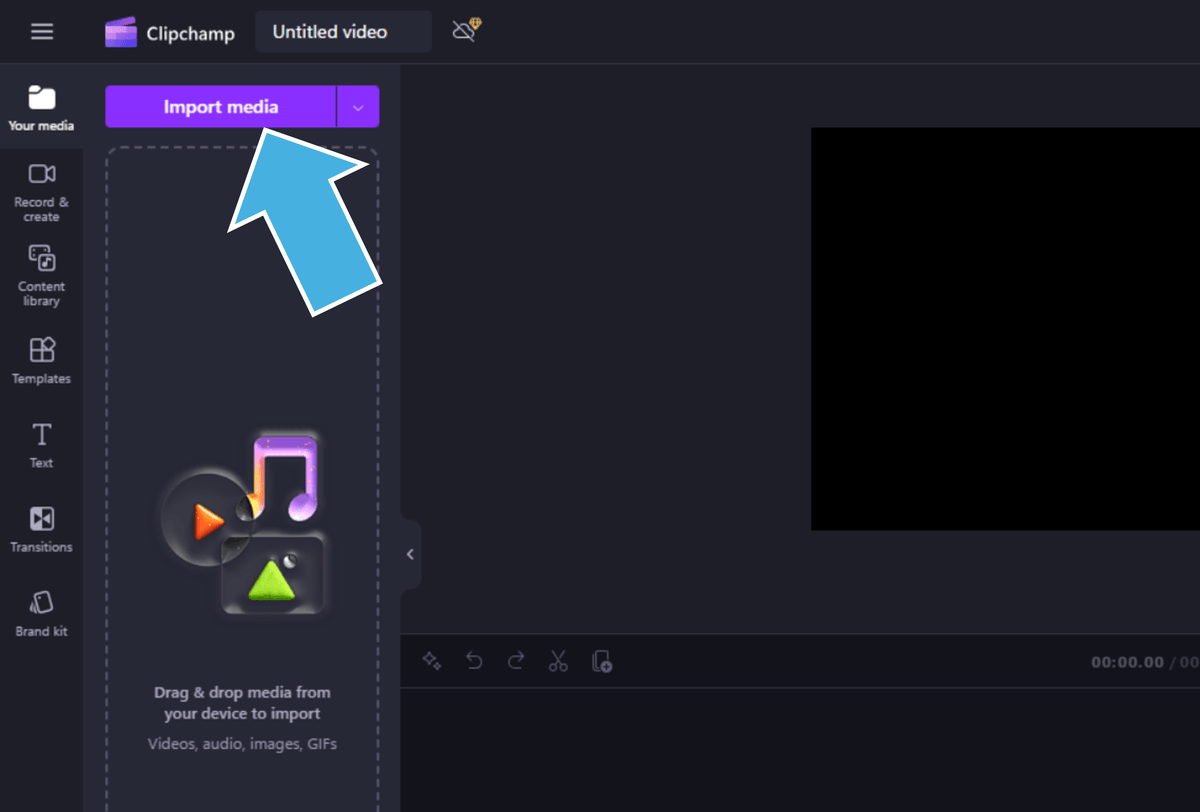
Next, you'll want to import your media. This includes any stock footage or other video content, images, audio tracks, and sound effects you might want to use. And if you're stuck for content? Try our stock asset search engine. 🙂
Click "Import media" in the top left, OR you can simply drag and drop from your file explorer into the Clipchamp media tab.
Once imported, you can drag and drop your stock footage, video overlays, background music and any other assets your have onto the timeline from the content library tab. Alternatively, hover over the media and click the green + button to add items to the timeline.
Your audio and visual media will automatically be put onto different layers on the timeline, as you can see below.
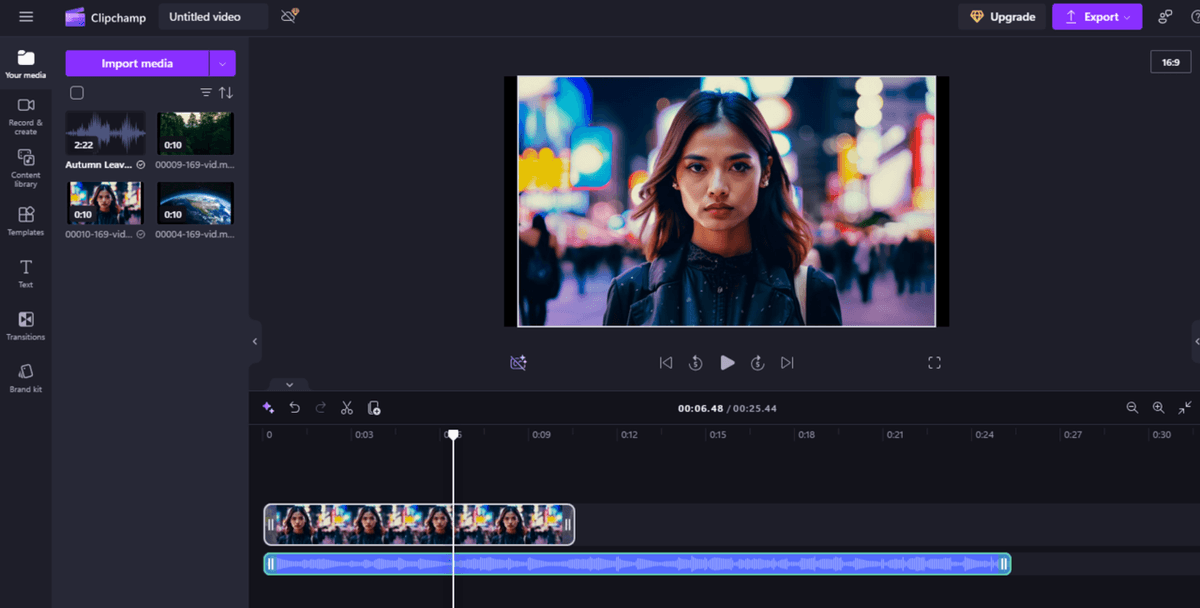
Well done! You now have the skills to put together a basic video edit in Clipchamp! Simple right? In the next section, we'll learn how to make engaging videos using effects in Clipchamp. Or if you want to play around a bit more first, learn how to trim videos in Clipchamp.
2. Adding Effects
Adding effects is a fundamental of video editing for the modern content creator. Adding these simple tweaks can take your content from beginner to pro really quickly. In this section, I'll cover the basic effects to use in Clipchamp.
Transitions
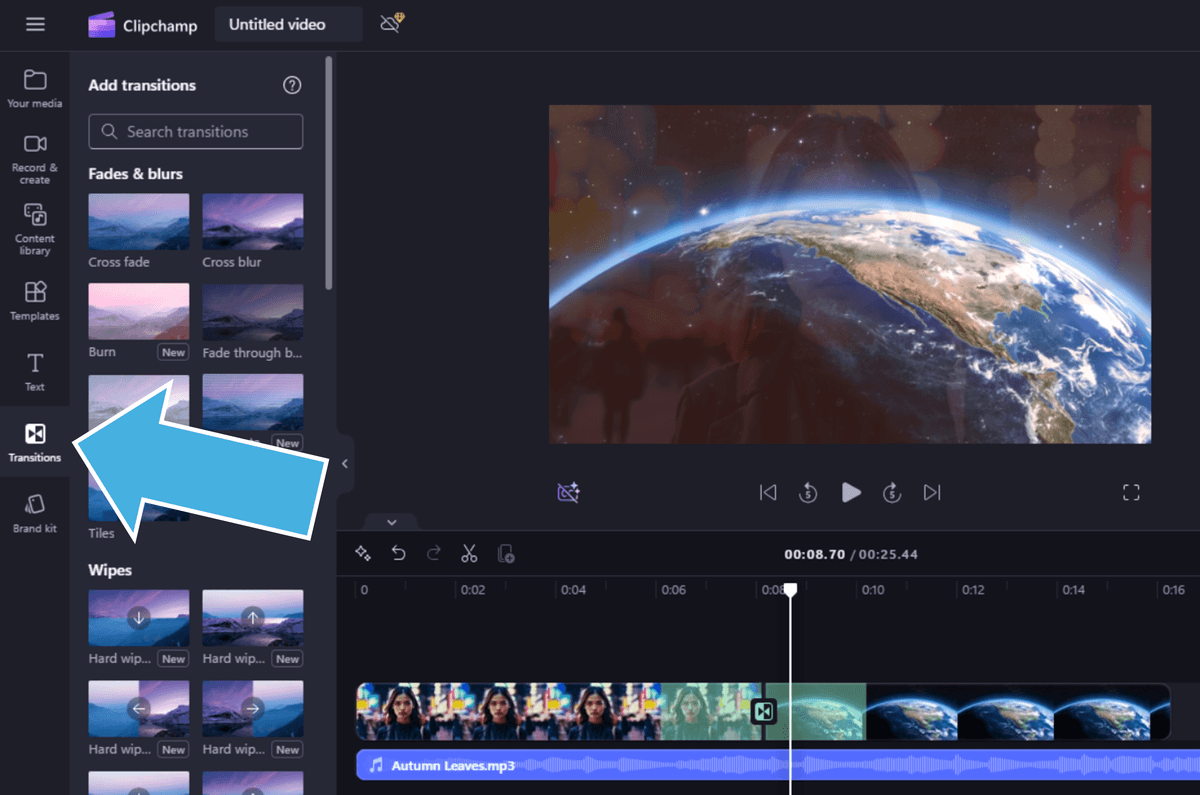
Transitions are neat video editing effects that can be used between individual video clips to give an impressive aesthetic to your content. To use transitions in Clipchamp:
- Add multiple stock video clips or images to the timeline
- Click the "Transitions" icon in the left side menu
- Find a transition you like, then drag and drop it onto the timeline
Text and Titles
Adding text is a great way to communicate a message or add branding to your content. To add text in Clipchamp:
- Click the "Text" icon in the left side menu
- Find a text effect that you like
- Drag and drop, or click the green + button to add the text effect to your timeline (notice it's added on a separate track to your video and audio tracks!)
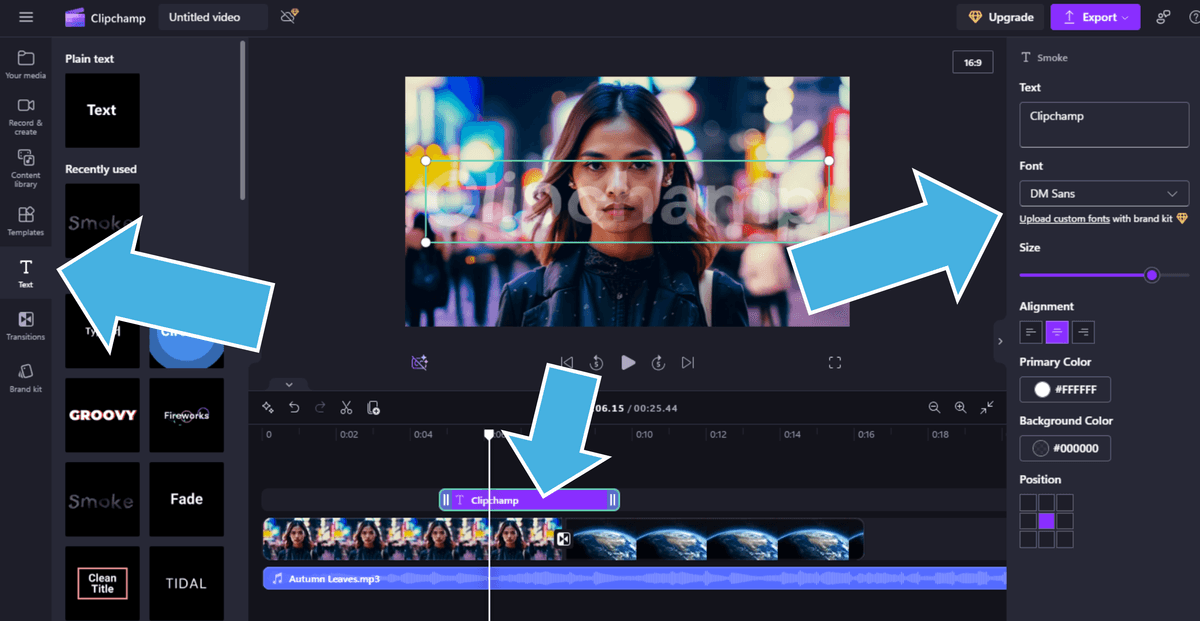
- Once added click the text icon on the timeline, from the menu that appears on the right you can edit the text content, text size, color, font, alignment, and position!
Note: Adding text is NOT adding subtitles/captions! We'll cover that next.
Subtitles and Captions
Adding effective subtitles and captions is an essential step for the modern video editor. Once you've added your audio track, or if there's speaking within your video, you're ready to add subtitles using Clipchamp's AI captioning tool:
- Click "Captions" from the right side menu, then click "Try now"
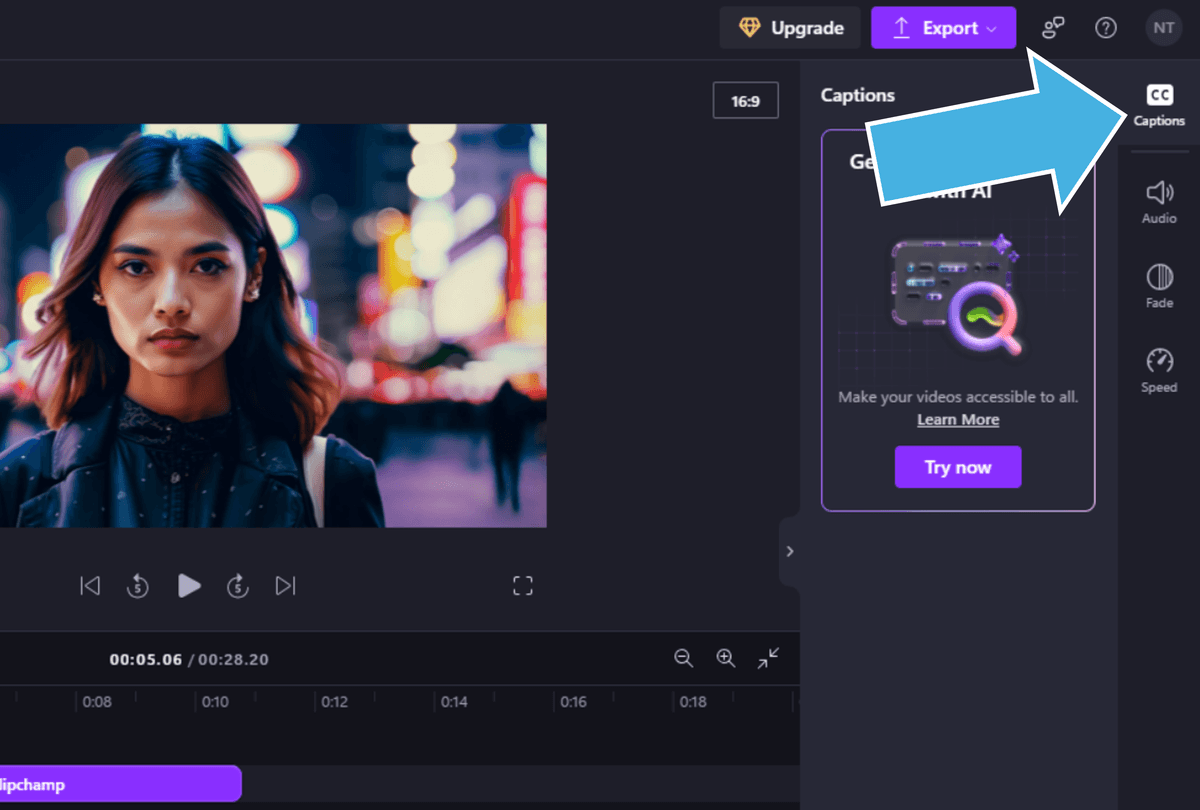
- Choose your language, and check the option to filter profanity if needed, then click "Transcribe media"
- Clipchamp's AI will transcribe your audio and automatically build the subtitle track. From the right menu you can download the SRT file for YouTube, hide captions in the video, and edit the captions in the transcript section.
- To edit the look of the subtitle, simply click one in the viewport and make your adjustments. Clipchamp will automatically apply your changes to all the captions!
How simple was that!? You've now successfully imported media, used some of Clipchamp's templates, and created accurate captions for your content!
3. Exporting
When you're ready to export your first video creation for the world to see, here's how to export your video using Clipchamp:
- Click the "Export" button in the top right hand corner
- Choose your video resolution from the menu. In most cases, 1080p will be enough, unless you've used 4k footage
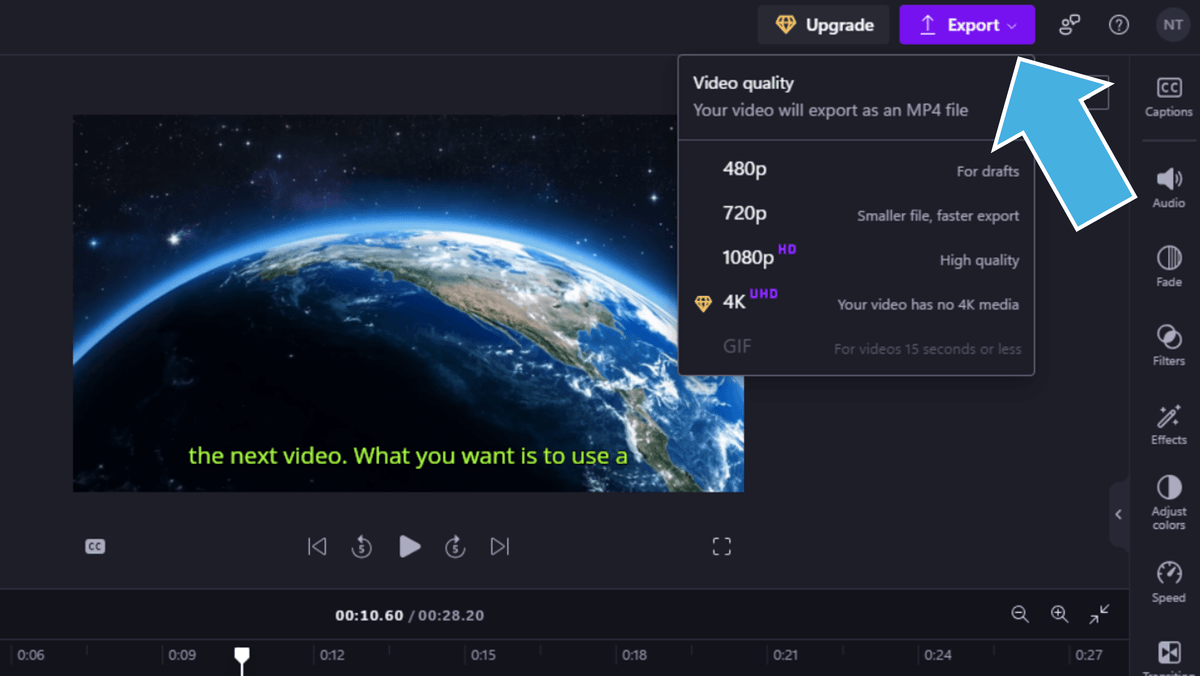
- Clipchamp will automatically export your video to the Downloads folder. From the next menu you can also chose to save to Google Drive, upload to YouTube, share to LinkedIn, and even send to TikTok!
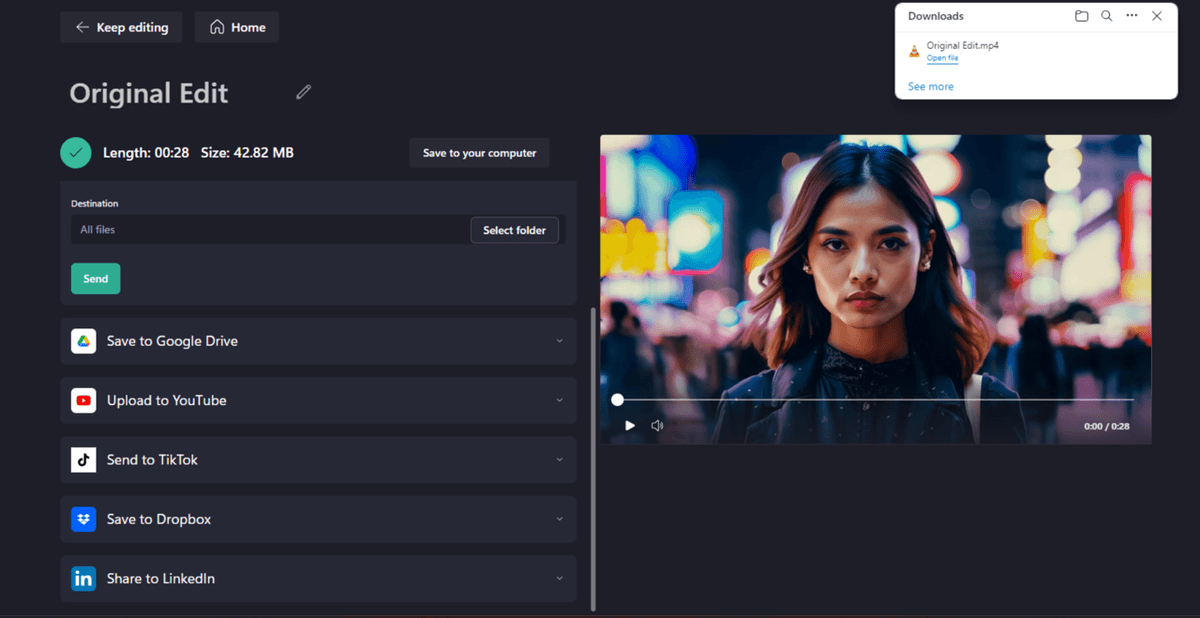
And we're done! Click "keep editing" to keep working on this edit, or click Home to start a new project.
Tired of Wasting Hours Looking For
Royalty-Free Assets?
Access our curated library of 100,000+ royalty free assets instantly
Wrapping Up
In my opinion, Clipchamp is the best free video editor on the market right now for morphing your video file into engaging videos.
Unlike CapCut and other editors, Clipchamp's free video editor allows you to create A-grade content easily and quickly. It's a great tool to use on your path to monetization.
This guide was a brief introduction to using Clipchamp for beginner video editing and video creation. If you want to learn more, and start creating with some of the more advanced features, take a look at the other content on our blog!
Happy editing. 😎
